GDU Disk Usage Analyzer is a graphical disk usage analyzer for GNOME. It was part of gnome-utils but was split off for GNOME 3.4. It was originally named Baobab after the Adansonia tree. The software gives the user a menu-driven, graphical representation of what is on a disk drive. GDU is inspired by godu, dua, ncdu, and df and is intended primarily for SSD disks to utilize parallel processing fully. However, HDDs work as well, but the performance gain is not so huge.
At the end of this guide, you will know how to install Gdu Disk Usage Analyzer on your Ubuntu 20.04 LTS Focal Fossa operating system in the following guide. The same principle will work for the newer version Ubuntu 21.04 (Hirsute Hippo).
Table of Contents
- Pre-requisites
- Installing Gdu Disk Usage Analyzer
- Uninstall Gdu Disk Usage Analyzer
- How to use GDU Disk Usage Analyzer
- Comments and Conclusion
Pre-requisites
- Recommended OS: Ubuntu 20.04 – optional (Ubuntu 21.04 and Linux Mint 20)
- User account: A user account with sudo or root access.
- Required packages: wget
Check and update your Ubuntu 20.04 operating system.
sudo apt update && sudo apt upgrade -yIf you do not have wget installed, install it if you are planning on downloading the source repository:
sudo apt install wget -yInstalling Gdu Disk Usage Analyzer
To download GDU Disk Analyzer, you need to visit their official download page and get the link to download it in your Ubuntu terminal. Once done, execute the following command:
wget https://github.com/dundee/gdu/releases/latest/download/gdu_linux_amd64.tgzNote, this link works, and you can skip visiting the download page. If in future it is broken, go to the downloads page to get an updated link.
Once downloaded, you need to extract the archive now to proceed with the installation.
tar xzf gdu_linux_amd64.tgzNow, you should execute the following command to list all your files with current permissions:
ls -l
sudo chmod +x gdu_linux_amd64Next, move the extracted file to the /usr/bin/ directory.
sudo mv gdu_linux_amd64 /usr/bin/gduTo verify the version and to verify the installation, you can execute the following command:
gdu --versionExample output:

Alternative Install Option – Snap
To save time, a quicker way is to install GDU Disk Usage Analyzer using snap. Snaps aren’t for everyone, and many dislike them, given the bloat and stigma they carry amongst sysadmins and advanced power users. Still, this option is totally acceptable for the average user and may be easier to maintain updates in the future.
To install snap, execute the following command:
sudo apt install snapdTo install the software with the snap software installer, enter the following command:
sudo snap install gdu-disk-usage-analyzer
Note, it’s ideal for executing the following commands if you are facing errors with snap installation. Initiating these commands will not harm you even if you are facing no issues.
snap connect gdu-disk-usage-analyzer:mount-observe :mount-observesnap connect gdu-disk-usage-analyzer:system-backup :system-backupsnap alias gdu-disk-usage-analyzer.gdu gduUninstall Gdu Disk Usage Analyzer
Suppose you would like the remove the disk utility software in future. This be can be done by the following commands:
Uninstall Snap Installation:
sudo snap remove gdu-disk-usage-analyzerUninstall Archive Installation:
sudo rm /usr/bin/gduHow to use GDU Disk Usage Analyzer
Now that you have installed GDU, it’s time to actually learn how to use some of the most common commands. The guide will run through some basics.
Firstly, to exit the GDU GUI, you can execute any of the following commands:
qctrl+cTo find help and further information, type the following command:
gdu --help
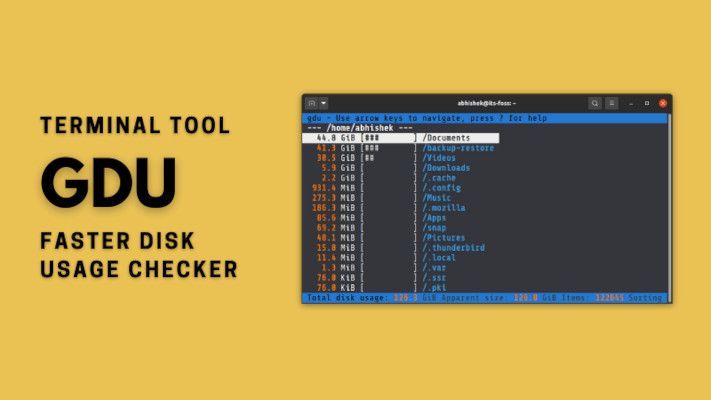
When no arguments are placed in the GDU command, the disk utility will scan the current directory. To do this, enter the following command:
gdu
You can also run the same command using a file path. Example:
gdu /var/log
View how much disk is being utilized and the amount of free space is available for all the mounted disks:
gdu -d
To display the directory apparent size only, execute the following command:
gdu -a
You can navigate folders using your (UP, DOWN, ENTER) keys to select and enter folders. To go back or even forward as an alternative to (ENTER), you can use the (LEFT and RIGHT) arrows on your keyboard.
Another feature when navigating folders, you can actually delete folders. Example below
First, bring up any GDU GUI interface, then navigate using your keyboard to the file or folder, for example:
gduNext, in our example, the guide is going to delete (test.log) as below using the (D) command in the terminal:

Once you have selected the file you want to delete, type:
dYou will get the following GUI pop-up, using your (ARROWS) keys to navigate, but for now, enter on yes.

Depending on the permissions of the file or directory, you may get a permission error as below:

If you do not like fancy colors and prefer old school black and white, you can execute GDU commands as follows:
gdu -c /path/to/folderUsing the (-c) creates the output GUI in black and white, example below:
gdu -c /var/logExample GUI output:

Comments and Conclusion
You have learned how to install GDU Disk Usage Analyzer and learn how to uninstall and use the basic commands in the guide. Overall, GDU does a very nice simple job in checking disks in a clean GUI. Other software does a better job, but if you prefer to keep things lite and easy, this is a great way to accomplish your goal in deciding whether sufficient space is available for running and installing new software applications and deleting redundant files and folders.
The software is maintained and updated regularly. I would advise not to install GDU through any apt package manager from any repositories as they are all lagging far behind and possibly insecure.