You’ve probably heard of the steep system requirements of Windows 11. You can’t install it on an unsupported computer – one that doesn’t have TPM 2.0, Secure Boot, or enough RAM. This checklist leaves many on the outside, theoretically unable to install Windows 11. However, the good news is that there are ways to overcome this issue and install Windows 11 on unsupported hardware. Similarly, free virtual machine applications like VMware Workstation Player Free don’t let you install Windows 11 easily by default. But you can bypass the Windows 11 checks in them too. Did we manage to make you interested? Here are a few ways to install Windows 11 on unsupported computers and on virtual machines:
CONTENTS
- How to install Windows 11 on any PC, even if it doesn’t meet the system requirements
- How to install Windows 11 on a virtual machine (VMware Workstation Player Free)
- Did you install Windows 11 on a virtual machine?
How to install Windows 11 on any PC, even if it doesn’t meet the system requirements
Before installing Windows 11, check whether your PC is compatible with this operating system. To see if it checks all the boxes, read all the minimum Windows 11 system requirements. If it does, there’s no need for you to bypass the TPM, Secure Boot, and RAM checks. Instead, follow all the instructions we presented in this guide: How to install Windows 11 from USB, DVD, or ISO.
However, if your PC doesn’t meet the Windows 11 requirements, follow the steps from one of the following two methods to install it on any computer by bypassing the mandatory Windows 11 checks.
Method 1. Install Windows 11 on any PC using commands to bypass the TPM, Secure Boot, and RAM checks
First, prepare a Windows 11 bootable USB memory stick using Microsoft’s Media Creation Tool, or burn a Windows 11 ISO file onto a DVD. Then, boot your PC using the Windows 11 installation disc or USB stick. Wait for a second or two, and your computer or device should briefly display a message asking you to “Press any key to boot from CD or DVD.” Do so and wait for the Windows 11 installation wizard to load.

Press any key to boot from CD or DVD
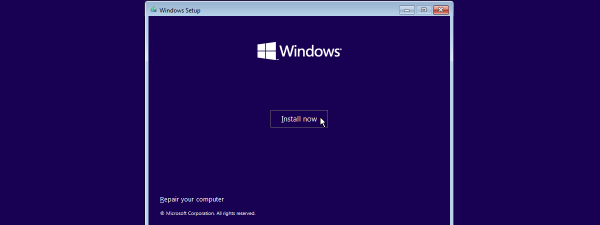
The Windows 11 install wizard begins by asking you to choose the language, time, and currency format, and then the keyboard or input method you’d like to use. Ignore this for the moment. Instead, simultaneously press the Shift + F10 keys on your keyboard to open Command Prompt.

Press Shift + F10 to open Command Prompt
This step is important, because if you would’ve continued the setup process normally, it would have eventually told you that “This PC can’t run Windows 11” because “This PC doesn’t meet the minimum requirements to install this version of Windows.”

This PC can’t run Windows 11
If your PC would have met all the Windows 11 system requirements, like TPM and Secure Boot, there wouldn’t have been any problem. However, because yours doesn’t, to be able to install Windows 11, you need to bypass the operating system’s checks. That includes TPM, Secure Boot, and RAM if you need to. Here’s how to do that:
After pressing Shift + F10, the Windows 11 setup process launches Command Prompt. In its window, type and execute the following commands one after the other, according to your needs:
reg add HKLM\System\Setup\LabConfig /v BypassTPMCheck /t reg_dword /d 1
reg add HKLM\System\Setup\LabConfig /v BypassSecureBootCheck /t reg_dword /d 1
reg add HKLM\System\Setup\LabConfig /v BypassRAMCheck /t reg_dword /d 1
The first one disables the TPM check, the second one the Secure Boot check, and finally, the third disables the RAM verification. All the commands should end with messages telling you “The operation completed successfully.” After you run all three of them, close the Command Prompt.

The commands that bypass Windows 11’s TPM, SecureBoot, and RAM checks
Now you’ve configured the Windows 11 setup to bypass the dreaded TPM, Secure Boot, and RAM checks, you should be able to install it on any computer. From here on, you can continue the installation as you normally would. If you need help with it, we’ve detailed all the next steps in this dedicated guide: How to install Windows 11 from USB, DVD, or ISO. After you finish installing it, you can start testing Windows 11 and see how you like it. ?

Windows 11 running on unsupported hardware
Method 2. Install Windows 11 on any PC using Rufus
Rufus is a tool that offers yet another method to install Windows 11 on any computer, regardless of whether it meets the system requirements. First, you’ll need to download a Windows 11 ISO file and also Rufus. Ensure that you get the latest edition of this app, and keep in mind that you can also get Rufus as a portable app. If you do that, you can simply run the executable file after you download it, without having to install anything on your computer.

Download and run Rufus
Once you have both Rufus and the Windows 11 ISO file, connect a USB drive such as a portable SSD or USB memory stick to your computer. Be careful to use a drive large enough to fit the Windows 11 setup files. 8GB or more is what’s recommended. Then, after you plug it into your PC, select it in the Device list from Rufus’ window.

Connect and select the USB drive for Windows 11
Then, click or tap on Boot selection, choose “Disk or ISO image,” and press Select next to it. In the new window that shows up, navigate and select the Windows 11 or ISO file that you downloaded earlier on your PC.

Select the Windows 11 ISO file
Next, you need to configure Rufus to create a bootable drive that doesn’t check for Windows 11’s system requirements. To do so, in Rufus’ window, click or tap on the Image option list and select “Extended Windows 11 Installation (no TPM / no Secure Boot).”

Choose Extended Windows 11 Installation (no TPM / no Secure Boot)
Next, select the Partition scheme and Target system. If you intend to install Windows 11 on a modern computer with UEFI, select the GPT Partition scheme and UEFI (non-CSM) Target system. Otherwise, if you want to install Windows 11 on an older computer that still uses BIOS, choose the MBR Partition scheme and BIOS (or UEFI-CSM) Target system.

Choose between GPT (UEFI, non CSM) and MBR (BIOS, UEFI-CSM)
You can leave the other settings as they are. To start building the Windows 11 USB drive, press the Start button at the bottom.

Start creating the Windows 11 installation drive
Rufus will warn you that it will erase all the partitions on the USB drive. That means that all the data on it is being deleted during the process. Ensure you don’t have anything on the USB drive that you might still need and press OK to continue.

Rufus warns you that the data on the USB drive will be lost
Wait for Rufus to create the bootable Windows 11 USB drive: if you want, you can check how the process is going by looking at the progress bar.

Rufus creates the Windows 11 USB drive
When done, Close the Rufus application. Then, you can use the USB drive to boot and install Windows 11 on any computer you like, even if it doesn’t meet the system requirements. For guidance on the next steps, read this article: How to install Windows 11 from USB, DVD, or ISO.
How to install Windows 11 on a virtual machine (VMware Workstation Player Free)
The best way to test a new operating system without putting your computers at risk is to install and try it on a virtual machine. That’s also true when it comes to Windows 11, Microsoft’s brand new operating system, which, although nice and shiny, comes with plenty of changes and also has its share of bugs. Unfortunately, as you already know, it has some steep system requirements, like Secure Boot and the need for a TPM 2.0 chip being installed, which is not something free virtual machine players can handle yet. Paid ones are usually easier to configure and have more options than free virtual machine apps, but they cost quite a lot of money. For most home users, that’s not something worth paying just to test Windows 11. The good news is that there is a way to install Windows 11 on a virtual machine using VMware’s Workstation Player, which is free for personal use. You will need to bypass the TPM and CPU checks of Windows 11, but as you’ve already seen in the first chapter of this guide, it is not as hard as it may sound. Without further ado, here’s how to install Windows 11 in a virtual machine using VMware Workstation Player (Free):
The first step to installing Windows 11 on a virtual machine is to get the right tools. Use your web browser again to download Windows 11. Then, you’ll need a good VM application. For now, the best VM apps that work well with Windows 11 are VMware’s virtualization solutions. And the one that we focus on in this guide is the VMware Workstation Player app that’s free for personal use. So, use your web browser again to download VMware Workstation Player. Then, install it on your computer.

Install VMware Workstation Player 16 Free
You now have both tools required to install Windows 11 in a virtual machine: VMware Workstation Player (Free) and the Windows 11 ISO file. Next, let’s see how to actually install Windows 11 in VMware’s free Player:
Fire up VMware Workstation Player Free on your computer. In its window, click or tap on “Create a New Virtual Machine.”

Create a new virtual machine in VMware Workstation Player Free
Choose “I will install the operating system later” in the “New Virtual Machine Wizard” window, and then click or tap on Next.

I will install the operating system later
Select Microsoft Windows under “Guest operating system,” choose Windows 10 x64 in the Version list, and press Next.

Choose Microsoft Windows and Windows 10 x64
Enter a name for the Windows 11 virtual machine and choose the folder location on your computer where you want to save its files. Then, press Next.

Enter a name and a location for the virtual machine
VMware Workstation Player Free now asks you to Specify Disk Capacity for the Windows 11 virtual machine. Enter 64GB or more, but not less, as this is the minimum free disk space required by Microsoft for Windows 11. Then, choose whether you want to “Store virtual disk as a single file” or “Split virtual disk into multiple files,” and press Next.

Set the size of the virtual machine drive to at least 64GB
On the next step of the Windows 11 virtual machine configuration wizard, you might be tempted to press Finish thinking you’re done. But don’t do that yet, as you still need to adjust a few settings:
When VMware Workstation Player Free says that it’s “Ready to Create Virtual Machine,” click or tap on Customize Hardware, not on Finish.

Click or tap on Customize Hardware
This opens VMware Workstation Player’s Hardware window. In it, select Memory on the left and increase the amount of RAM allocated to the Windows 11 virtual machine to at least 4096MB.

Allocate at least 4GB of RAM for the virtual machine
If you have a powerful processor, you might also want to increase the number of CPU cores allocated to the Windows 11 virtual machine. However, that’s not mandatory, as VMware Workstation Player Free gives it two cores by default, which is the minimum required by Windows 11.

Set the number of CPU cores available to the virtual machine (at least 2)
Next, select CD/DVD (SATA) on the left of the Hardware window. Then, on its right side, select “Use ISO image file” and Browse or type the location of the Windows 11 ISO file you downloaded on method two of this guide.

Specify the location of the Windows 11 ISO file
You can leave the other settings as they are or customize them to your liking. Once you’re done, click or tap the Close button from the bottom-right corner of the Hardware window and then the Finish button from the “Ready to Create Virtual Machine” window.
Back on the dashboard of VMware Workstation Player Free, the Windows 11 virtual machine is now created and listed on the left side of the window. To start it, double-click on its name on the left, or select it first and then click/tap on “Play virtual machine” on the right.

Start the virtual machine
Then, the virtual machine starts from the ISO file and loads the Windows 11 installation wizard. The next steps are exactly the same ones we’ve shown you in the first method from the first chapter of this guide. Follow the instructions exactly, and you’ll be able to bypass the TPM, Secure Boot, and RAM checks in no time. In short, when the Windows 11 wizard launches, press Shift + F10 to open Command Prompt and run these commands:
reg add HKLM\System\Setup\LabConfig /v BypassTPMCheck /t reg_dword /d 1
reg add HKLM\System\Setup\LabConfig /v BypassSecureBootCheck /t reg_dword /d 1
reg add HKLM\System\Setup\LabConfig /v BypassRAMCheck /t reg_dword /d 1

The commands that bypasses Windows 11’s TPM, SecureBoot, and RAM checks
Then, you can continue to install Windows 11, as you won’t be bothered by any other issues regarding unsupported hardware anymore.
Did you install Windows 11 on a virtual machine?
Now you know how to install Windows 11 on any computer and in any virtual machine application. So all there’s left to do is try Windows 11 and decide whether you want to keep it. ? Let us know how it all worked out for you and whether you encountered any issues installing Windows 11 on an unsupported computer or in a virtual machine.