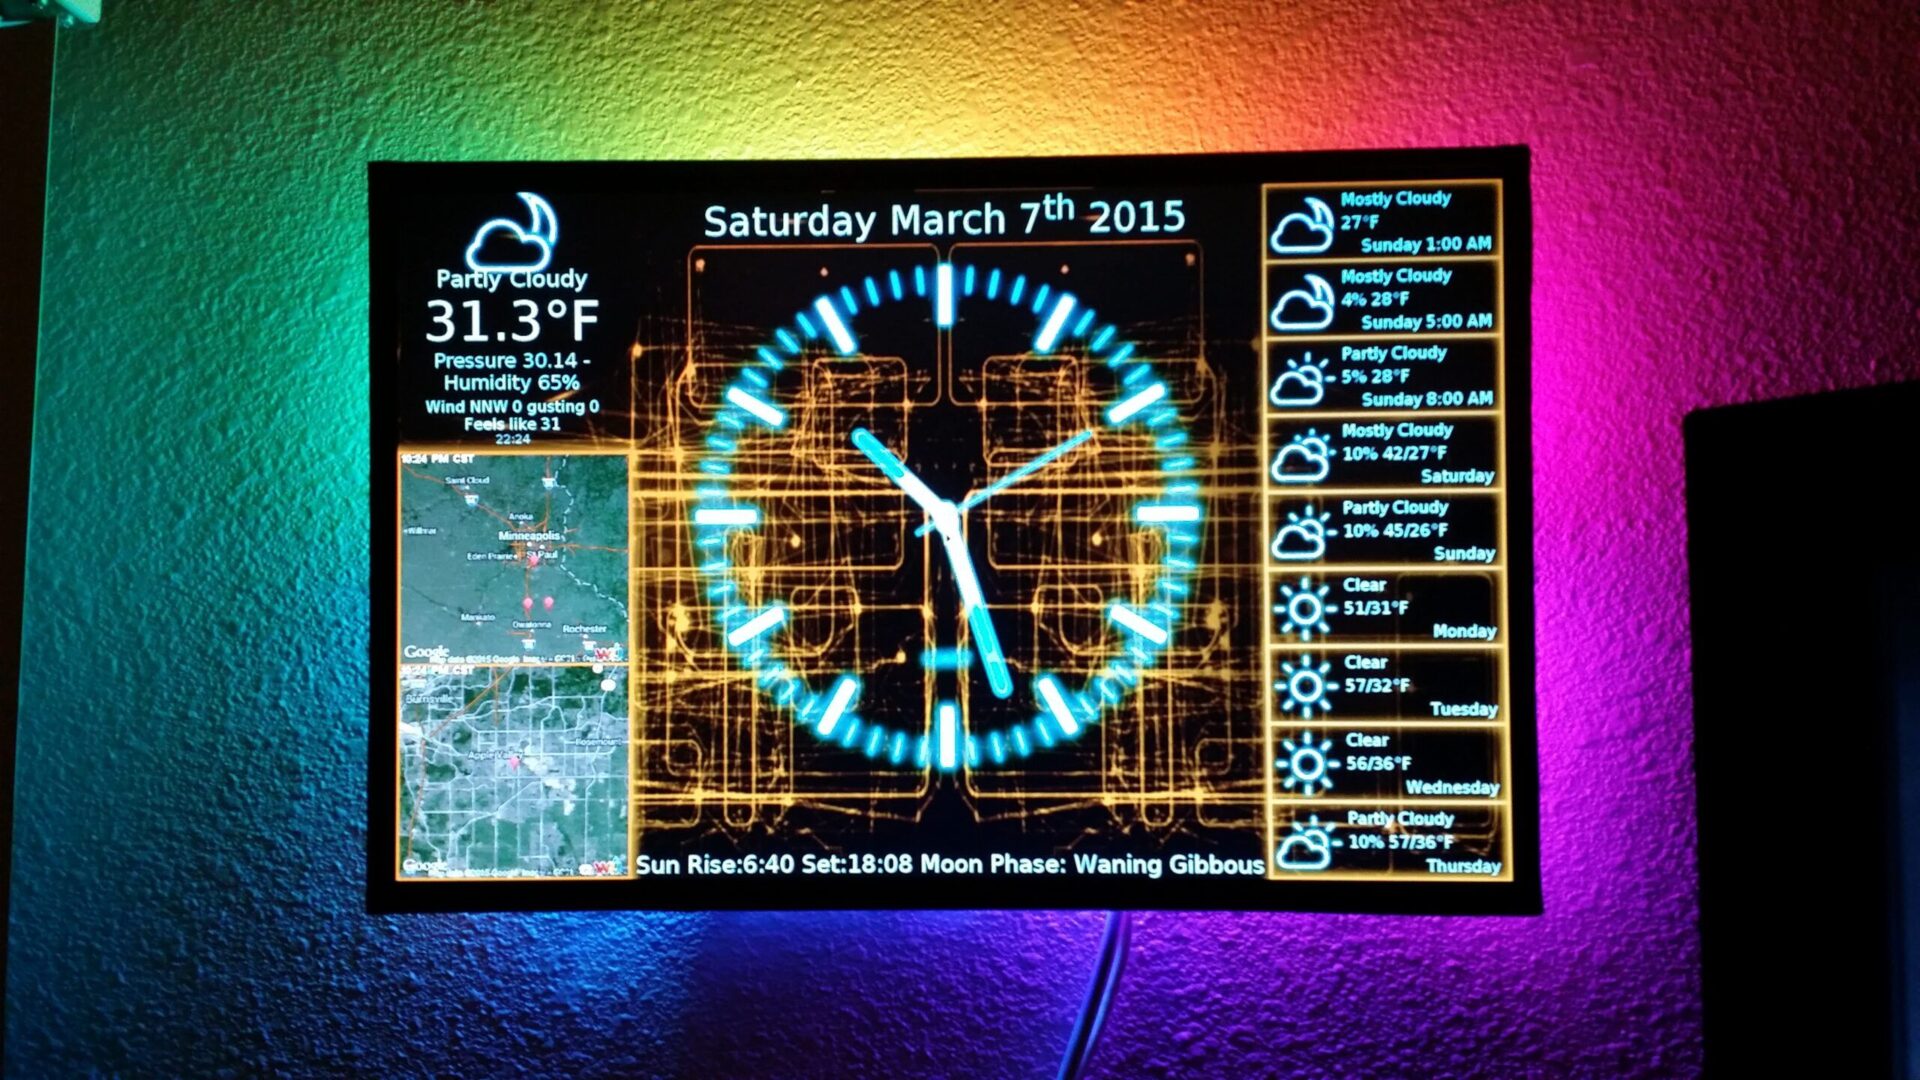
This project is a fancy Clock and weather display built around a monitor and a Raspberry Pi.
Please note that this project was originally started by Kevin Uhlir / n0bel but appears to have died and gone out of support. There are 230~ forks of his project; this is my attempt to keep this project going to the best of my ability.

- A Raspberry Pi (revision 2) Model B, or B+, Pi 2 Model B, Pi 3 or Pi 4. I use a Pi 4 as I am dual purposing the clock as a miner since the clock is “always-on”. This is an all-in-one kit with all of what you should need to get you going. You don’t need to get this kit if you know what you are doing and can source the parts individually.
- A Display Monitor & HDMI Cable. Any display that is HDMI should work.
- 5V Power Supply (for Pi) Power Supply. You might get “low power” warnings if you don’t use a proper rated Pi Power supply. The “Kit” mentioned above comes with the right one, but if you don’t get the kit, think about using this one. CanaKit USB-C for the Raspberry Pi 4 or the CanaKit Mircro USB for Raspberry Pi 3 and below.
- A USB Keyboard and Mouse for setup and occasional use if you don’t want to VNC into the PiClock. Any one of these would work from Amazon.
- A USB 3.0 MicroSD Card Reader. Any one of these should work, choose the options and price best for you.
- A MicroSD card, at least 16 gigs. Any one of these should work depending on your budget. You could possibly go for one smaller, but the 16 gig ones are relatively inexpensive and leave you some wiggle room down the road if you want to install other things. I have 2 of these in my house, and I dual-purpose them with CryptoMining in the background.
- USB Wifi or Internet Connection
- (optional) One or more DS18B20s (for showing the inside temperature)
- (optional) A string of WS2818-based RGB LEDs to “backlight” the display. I have no suggestion on which to use or size/length. It depends on your situation.
- (optional) TSOP4838 . This is if you choose to integrate your Pi with remote control. I have no suggestion for this as I didn’t implement it with my setup, but it was added to the Bill of Sale as optional.
- (optional) An IR Remote control. It is suggested to use this one.
Ok, now that we are done shopping and have our parts, let’s get going!
Step 1
Choosing your Options
The PiClock, in its basic configuration, is a Raspberry Pi and an HDMI Monitor (and power and SD card, of course, and possibly a WiFI dongle). This project has several optional items.
- NeoPixel Ambilight
- DS18B20 Temperature sensors
- IR Receiver
- Push Button controls
You could proceed through these instructions without any hardware extras and add them later.
All of the optional hardware wiring and instructions are documented here: https://github.com/n0bel/PiClock/blob/master/Documentation/Hardware.md
I’d suggest you read through that first if you’re considering adding these options.
Step 2
Hook things up
Begin by setting up your HDMI Monitor, Raspberry Pi, and power supply. Some manner of keyboard and mouse will also be handy, connected via USB. I’m assuming most everyone can get this far on their own. If you’re going to do those hardware extras mentioned in the prior instruction, put them together as well.
Step 3
Download Raspbian Bullseye and put it on an SD Card
Raspberry Pi has developed a graphical SD card writing tool that works on Mac OS, Ubuntu 18.04, and Windows called Raspberry Pi Imager; this is the easiest option for most users since it will download the image automatically and install it to the SD card. Download it and install it.
“Raspbian Bullseye with desktop” will work with many Raspbian versions, but you may have to add more packages, etc. That exercise is left for the reader. As of the time of this reading, “Bullseye” is the name of the current Raspberry Pi OS; this may change as this article ages.
What follows is a step-by-step guide. If you start with a new clean Raspbian image, it should just work. I’m assuming that you already know how to hook up your Raspi, monitor, and keyboard/mouse. If not, please do a web search regarding setting up the basic hardware for your Raspi.
The image and instructions for doing this are on the following page: https://www.raspberrypi.org/documentation/installation/installing-images/README.md